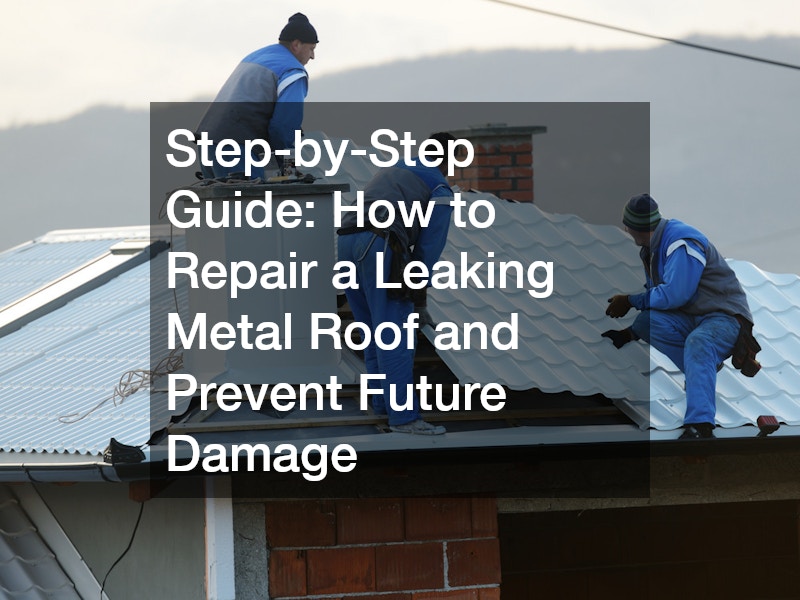
Step-by-Step Guide: How to Repair a Leaking Metal Roof and Prevent Future Damage
Ensuring the longevity and durability of a metal roof is crucial not only for aesthetic reasons but also for maintaining the structural integrity of your home. Leaks, if left unattended, can lead to significant water damage, mold growth, and compromised building materials. Common causes of leaks include poor installation, environmental wear, and inadequate maintenance. This guide aims to equip homeowners with actionable steps to repair leaking metal roofs and prevent future issues, safeguarding their investments and enhancing their home’s value.
Metal roofs are known for their strength and durability, yet they are not immune to damage. Several factors can trigger leaks from harsh weather conditions, such as heavy rain and snow, to simple wear and tear over time. Understanding these causes is the first step toward effective repair and prevention. This article breaks down these causes, provides a comprehensive repair guide, and shares tips on preventing future leaks and ensuring your metal roof is robust and long-lasting.
Homeowners often overlook the importance of regular roof maintenance, risking costly repairs down the line. A proactive approach, including regular inspections and minor repairs, is vital in extending the life of your roof. Our detailed guide uses easy-to-follow steps to help you mend leaks and fortify your roof against potential damage. Equipped with the right tools and knowledge, you can confidently address and prevent leaks, securing both your roof’s integrity and your home’s safety.
Understanding the Causes of Leaks in Metal Roofs
One of the primary reasons for leaks is improper installation. This includes poorly fastened or sealed regions susceptible to water intrusion over time. Additionally, metal sheets may not be correctly aligned when overlapped, allowing moisture to seep through at the joints. It’s pivotal for homeowners to conduct thorough inspections post-installation, ensuring fasteners are secure, and metal sheets are properly aligned. Addressing these issues sooner rather than later prevents costly damage and prolongs the life of the roof.
Corrosion or rust is another common culprit behind leaking metal roofs. Over time, metal roofing materials can succumb to rust, creating holes or weak spots. Routine inspections are crucial, as they help identify early signs of rust and degradation, allowing for prompt intervention. When rust is detected, it is essential to apply appropriate rust removers or inhibitors to halt any further damage. This regular maintenance ensures the longevity and effectiveness of the metal roof.
Flashing and seals play a critical role in protecting your roof’s integrity. However, due to constant exposure to the elements, these components can wear out, particularly around high-stress areas like chimneys, vents, and valleys. It’s important to check these areas for signs of distress or leakage regularly. Proper maintenance and timely repairs, including resealing and replacing degraded flashing, are necessary to prevent water from breaching these vulnerable spots. For additional insights, homeowners are encouraged to learn more about roof valley repairs.
Tools and Materials You’ll Need
Before embarking on any repair project, having the right tools and materials is critical for success. Essential items include metal roofing sealant, roofing screws, patching materials, and rust removers. Metal roofing sealants come in various formulations, with some specifically designed to bond with different types of metals like aluminum or steel. It’s crucial to consult with a professional or a reliable source to ensure material compatibility with your specific metal roof type. By sourcing these materials from trusted local suppliers or online vendors, homeowners can ensure quality and reliability for their repair projects.
Safety should never be neglected during roof repairs. Essential safety equipment includes gloves for hand protection, a sturdy ladder for access, a harness for added security, and non-slip shoes to prevent any accidental falls. Adhering to safety protocols minimizes the risk of injuries and ensures a smooth repair process. It’s vital to inspect all safety equipment before use to confirm it is in good condition, thus providing the best protection for homeowners tackling roof repairs.
In addition to core repair materials, accessories like wire brushes or sandpaper for surface cleaning and rust inhibitors for corroded areas can vastly improve your repair results. These tools assist in preparing the roof surface, ensuring optimal adhesion of the patching materials. Homeowners should also consider investing in a durable caulking gun, enabling precise application of sealants. By assembling a comprehensive toolkit, you can approach your metal roof repair project with confidence and efficiency.
Step-by-Step Instructions: How to Repair Leaking Metal Roof
Step 1: Inspect the Roof Thoroughly

A thorough roof inspection is the first crucial step in identifying and addressing leaks. Prioritize safety by inspecting only in dry, stable conditions, wearing appropriate gear, and ensuring someone is aware of your activities. Begin by inspecting areas notorious for leaks, such as around chimneys, skylights, and roof valleys. Look for loose screws, rust spots, visible gaps in the metal sheets, and any indications of underlying issues that may have caused the leaks. By documenting your findings, you can better strategize the repair process and order necessary materials.
During your inspection, take note of any water stains or streaks visible underneath the roof. These blemishes indicate potential leak spots and help pinpoint areas requiring immediate attention. Check that all flashing and seals are intact and that fasteners remain secure, as any compromise could lead to further damage. If any areas appear beyond a simple DIY fix, consult with a roofing professional to assess and advise. Regular, detailed inspections help maintain your roof’s condition and can lead to early detection of potential issues.
Don’t neglect to inspect the interior of your attic or ceiling for signs of water intrusion. Water stains, discolored paint, or mold growth suggest the presence of leaks that have penetrated the roofing material. Confirm lighting conditions and ventilation are adequate to prompt any early revelation of irregularities. If necessary, use a flashlight to illuminate darker sections, focusing on junctions where high water ingress likelihood exists. Consistent monitoring of both exterior and interior regions enables homeowners to manage their roof health effectively.
Step 2: Clean the Area Around the Leak
Proper surface preparation is a critical step in achieving a lasting repair. Begin by removing any dirt, debris, or rust from the area surrounding the leak. Using a wire brush or sandpaper, gently scrub the metal’s surface to remove any oxidation or grime that could impede the effectiveness of the repair materials. This preparatory work creates a plain surface for sealants and patches to adhere to, ensuring a secure fit. Stepping back to assess the cleansed zone, re-evaluate if further cleansing or rust treatment is necessary before advancing.
In cases where rust has significantly compromised the metal, applying rust inhibitors is crucial. These products chemically neutralize rust, preventing further corrosion from undermining the integrity of the roof. When selecting a rust inhibitor, ensure it is compatible with your metal type and follow the manufacturer’s instructions for optimal results. Regular maintenance with rust inhibitors can extend the life of metal roofs by preventing further damage caused by rust and exposure to the elements. Ultimately, better-prepared surfaces lead to higher-quality repairs and prolonged roof performance.
Once the zone is cleaned and rust-free, always remember to use a dry cloth to wipe away residual moisture before progressing. Any trapped water or moisture residue can compromise the adhesion of the patching material. Drying also assists in better sealant bonding, preserving the applied repairs longer. In essence, a well-prepared site offers numerous advantages for successful repairs and guarding against emerging problems. Taking time for meticulous preparation pays dividends through enduring roof health and sustained mental vitality.
Step 3: Patch Holes and Gaps
With the roof’s surface clean and dry, the next step is to address holes and gaps. Cutting a fitting metal patch slightly larger than the hole is recommended for larger holes. After positioning the patch, apply a generous bead of metal roof sealant around its perimeter, ensuring coverage across the entire edge for a watertight seal. Secure the patch using roofing screws, with a focus on the patch’s edges to prevent any lifting or peeling over time. This careful application guarantees comprehensive coverage, minimizing potential water ingress from the patched area.
For smaller leaks, using metal roofing sealant alone can be sufficient. Ensure the sealant used is compatible with your roof’s existing material—whether it be aluminum, steel, or another metal type. Apply the sealant directly over the cracks or gaps, smoothing it to eliminate air bubbles and ensure an even spread. Some sealants include metal particles and additives that enhance adhesion and UV resistance. Confirm the product’s specifications align with your roof’s needs, creating a formidable seal against environmental elements and roof wear.
Patched areas should be allowed the proper time to cure before replacing any shingles or applying additional stress to the repaired zones. This waiting period allows sealants to bind effectively, improving the durability of the repair over time. Regularly check these areas post-repair for any signs of compromise or sealant degradation, addressing them promptly to maintain the integrity of the roof. By applying patches and sealants correctly, you fortify your roof against leaks and extend its life.
Step 4: Replace Damaged Fasteners
An integral part of repairing a leaking metal roof is to assess the condition of all fasteners around the affected area. Damaged screws or fasteners can directly contribute to leaks and must be replaced immediately. Opt for rubber-washer roofing screws, as they provide a superior seal to prevent water ingress. As screws are replaced, ensure they are driven straight to avoid creating additional stress on the metal panels, which can lead to further leaks. Regularly monitoring fastener health supports ongoing roof integrity.
To ensure an effective repair, it’s vital to replace fasteners with compatible materials matching existing roof components. Using a non-compatible or substandard fastener may lead to corrosion, loosening, or new points of ingress. Confirm materials are galvanized or offer adequate corrosion resistance for long-lasting protection. Also, while replacing fasteners, take care not to over-tighten, as this can distort the metal roofing material, opening up potential areas for leaks.
Replacing fasteners can be an intricate task requiring care and precision. Working systematically around the leaking area, double-check all connections to ensure they are secure. Avoid rushing the process, as diligent replacements are key contributors to successful repair efforts. It’s imperative to follow manufacturer guidelines when working on an active warranty, safeguarding your roof’s value and compliance to extend its service life.
Step 5: Seal the Joints and Overlaps
Ensuring that the joints and overlapping portions of the metal sheets are properly sealed is crucial to preventing leaks. Use a high-quality roofing sealant, preferably silicone-based, for greater flexibility and weather resistance. As temperature fluctuations lead to expansion and contraction, silicone sealants remain pliable to fortify your roof’s defenses. Spread the sealant along the joints and overlapping sections, ensuring complete coverage to prevent moisture penetration. This added measure strengthens the roof and minimizes the chances of future leaks.
Temperature changes present a common threat to metal roofs, causing alignment shifts in the sheets. During the sealing process, take the time to inspect these overlaps under natural tension conditions and identify any compromised regions requiring resealing. Corrective actions help address any hidden threats, ensuring a robust seal and shield from environmental changes. Invest in high-grade sealants, as these products ultimately influence repair longevity and resilience. By forming a strong seal in high-stress areas, roof health is maintained against diverse climactic influences.
Furthermore, applying sealants accurately helps mitigate voids and pockets within seams where water may pool or seep internally. Avoid over-application, as excessive sealant can become unstable and lose adhesion over time. Instead, distribute uniformly with sufficient pressure, smoothing the layer upon application. Follow specific product cure times, allowing the sealant optimal setting duration and optimal flexibility. Protecting metal roof joints through conscientious sealing reinforces their durability and minimizes water intrusion threats.
Step 6: Reapply or Replace Flashing
Flashing’s role in metal roofs cannot be understated, as it prevents water ingress at crucial junctions. Flashing often experiences wear due to elemental exposure, making regular checks and timely replacements or resealings a must. Start by inspecting existing flashing for gaps, bends, or wear, as compromised flashing is a significant leak source. When refitting, pay meticulous attention to chimneys, vents, and valleys, areas notorious for water pooling. Act promptly to safeguard both flashing components and adjacent roof features as part of an anti-leak effort.
Reapplication of flashing begins with addressing any manifest weaknesses or missing segments identified during inspections. Secure with roofing sealant, using appropriate adhesives or fasteners when necessary. Installation ease and securement techniques may vary among metal roof styles—means confirming specification alignment enhances repair efficiency. Where large flashing areas are compromised, consider complete replacement to enable optimal coverage of at-risk areas and renew protective performance. Strong flashing fortification aids in long-lasting water resistance.
Flashing repair knowledge combined with access to informative resources facilitates home maintenance endeavors. Providing such repair services independently requires adherence to manufacturer directives or expert consultations for detailed interventions. Incorporate insights on roof valley repairs to fully comprehend all flashing nuances, thus enriching your metal roof management. Fundamental post-repair evaluations verify the resolution’s efficacy, confirming primary leak points are secured and guiding future inspection routines.
Step 7: Preventative Maintenance for the Future
After addressing leaks, establishing a routine preventative maintenance schedule is critical for avoiding similar issues in the future. Regularly inspecting gutters and roof valleys for debris buildup can prevent unwanted water accumulation. This proactive reclamation inhibits water stagnation or overflows, causing leak development while also protecting related roofing structures. Schedule inspections at least bi-annually or around seasonal extremes, timing regular assessments to arm your roof against evolving conditions. By integrating routine checks into standard home care, emerging threats are isolated early and stifled intelligently.
Furthermore, plan to reapply protective coatings specially and periodically designed to combat rust and UV impact. These roof coatings enhance resilience and shielding, safeguarding against typical metallurgical detriments precipitated by extended environmental exposure or elemental missteps. Additionally, enrichment actions preserve visual appeal while supporting thermal efficiency by reflecting solar radiation—thus yielding substantial energy advantages and property values. Investing in roof coatings promotes balanced vitality for sustainable metal roof performance.
Comprehensive roof protection involves both active measures and vigilant inspection, as ignoring aberrations often accentuates problems encountered during repair cycles. A well-inspected roof coupled with regular maintenance and attentive management forms a deterrent against deterioration, fortifying assets cohesively. Homeowners benefit significantly from valorizing and prioritizing roof health in home-care practices for secure, enduring living environments and supported structure reliability. Such committed oversight battles emerging risks proficiently, cementing home stability for forthcoming years efficiently.
How to Prevent Leaks from Happening Again
1. Regular Inspections and Maintenance
Diligent year-round inspections form the cornerstone of leak prevention in metal roofs. Schedule evaluations systematically, covering exterior and interior roof regions to highlight potential problems early. Factor in seasonal changes and environmental challenges like heavy rains or freeze-thaw cycles, timing assessments advantageously post-severe climate incidents. Prompt repairs forestall progressive issues and retain metal roof stability across varied home operating conditions. Interconnect inspection occurrences with comprehensive maintenance routines, ensuring complete coverage for roof welfare.
Preserve checklists encompassing detailed roofing criterion review, helping devise methodical inspection pathways. Include both module aspects, such as seams, fasteners, and flashing, as well as underlying components unobservable directly from exterior perspectives. Organize findings to enhance continuity through preceding assessments, creating guidance for damage specifically manifest through subsequent studies. Actively follow through indications indicating potential fault emergence, addressing notable vulnerabilities expressly identified during primary analysis for subsequent route identification.
Document experiences correlated to check-ups systematically enables enhanced mitigation capacity—useful personal records consolidate inspection experiences into useful trend aspects analyzed. Follow established precedents, mitigating recurrent leaks developed per structural inadequacies through adept insights detected early. A coordinated inspection regime ultimately builds long-term durability and genuine confidence in homeowner maintenance journeys as proficient support for proactive asset care.
2. Roof Coating Applications
Applying protective roof coatings every five to ten years yields significant benefits for metal roofing systems. These specialized surface applications prevent corrosion and address UV and weather damage, extending roof vitality and structural integrity seamlessly. When selecting coatings, prioritize high-performance formulations designed specifically to resist rust influence and complement active insulation features. Coordination with reputable suppliers or consulting seasoned roof specialists ensures the selection aligns precisely with specific provisions exhibited by your roof’s makeup and structure.
Secure well-qualified professional coating applications where complexity exceeds independent execution. Accurately assess innate surface stability before starting application measures, executing thorough inspections before engagement to match necessary clearances. Establish clarity assessments on coating needs, aligning the application backward to your broader long-term and interim coverage strategies. Upon completion, periodical re-assessment mirrors noteworthy renewals, commanding adequate preparation for follow-up applications.
Regular coating upkeep fosters balanced noise isolation features, supplementing roof presence conditions with impactful enhancement functionality. Exploring newly introduced products may unlock improved thermal efficiency potential, optimizing metal panel insulation characteristics efficiently relative to originals instituted previously. For roof enhancements attributing core capabilities reliably alongside recommended inspectors might provide substantial savings, maneuvering obstacles related to environmental interaction successfully due to reinforced coverage achieved effortlessly.
3. Maintaining Gutters and Drainage Systems
Draining system support forms an inseparable aspect of comprehensive roof maintenance, preemptively protecting metal roofs by limiting water contact possibility.Regular cleaning and debris removal ensure that water flows smoothly through gutters and downspouts, preventing pooling, which could otherwise lead to rust and deterioration in metal roofs. By maintaining an effective drainage system, you minimize water exposure, ensuring the long-term durability of your roof.
Conclusion :
By following these steps—inspecting your roof regularly, fixing leaks promptly, and maintaining gutters and drainage systems—you can significantly extend the lifespan of your metal roof. Preventative measures, including using sealants and fastener checks, will not only help you address existing issues but also protect your roof from future leaks and damage. Consistent upkeep is key to safeguarding your home and ensuring that your roof continues to provide optimal protection.
